After you've finished downloading the file, extract the file and copy all files and folders into the Apache Document Root.
If you installed Apache as described here "How to install Apache on Windows 10" the Apache Document Root is "D:\MyWebs"
Please read the Wordpress "readme.html" included in the Wordpress installation folder to ensure that your Local Server meet the minimum system requirements.
As for the example, I am going to install WordPress Version 4.7, the minimum system requirements are PHP version 5.2.4 or higher and MySQL version 5.0 or higher.
The System Recommendation are PHP version 7 or higher, MySQL version 5.6 or higher and Apache "mod_rewrite" module
The mod_rewrite module is a rule-based rewriting engine to rewrite requested URLs such as htaccess. To enable this module open up the Apache configuration file located in "C:\Apache\conf\httpd.conf" and find the following line:
#LoadModule rewrite_module modules/mod_rewrite.soUncomment it to enable:
LoadModule rewrite_module modules/mod_rewrite.soIn the Directory DocumentRoot find the line below:
AllowOverride NoneChange it to:
AllowOverride All
Save the configuration and restart the Apache Server.
Installing WordPress
Create a new database using phpMyAdmin or command line name it "wordpress"
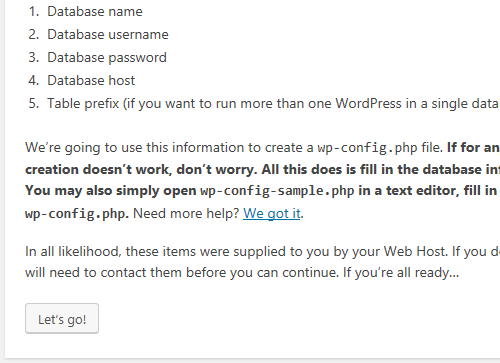
Open up your browser, in the address bar type in "http://localhost"

Click on "Let's go!"

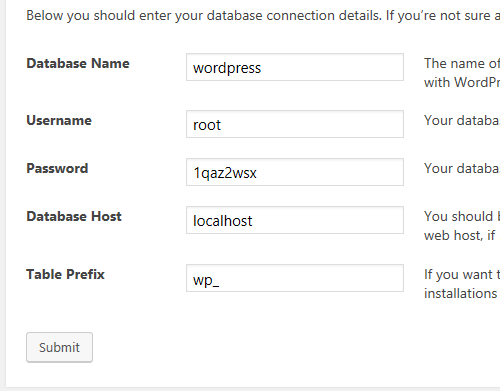
Fill in the Database name, MySQL username and password and then click on "Submit"

If the data you entered are correct, you will see the above window, click on "Run the install"

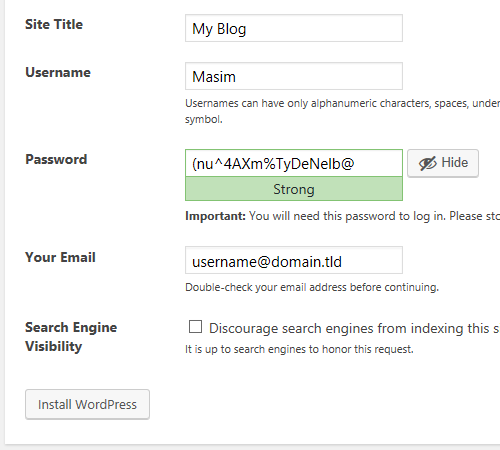
Fill in the Site Title, Username and Password. Don't forget your Username and Password, we need them to be able to login later on. Your E-mail and Search Engine Visibility are not important here, you can enter a fake email as well. Click on "Install WordPress"

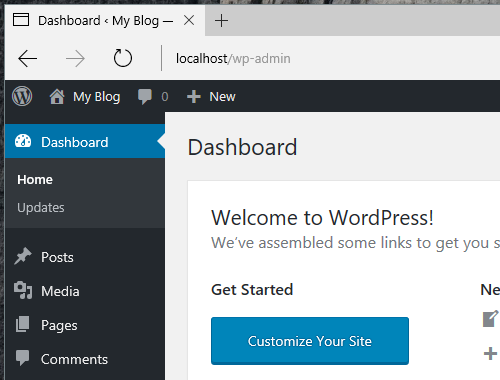
Next you will be taken to the WordPress Admin area.
You can now start blogging or explore WordPress features and settings.
To view your new Wordpress Blog, navigate to "http://localhost"
Here is a video on YouTube How to install WordPress on Localhost
No comments:
Post a Comment