The first way (the easiest one) is by using WordPress Export/Import Tools.
But before we begin to move the WordPress from hosting to localhost make sure that you have already installed a fresh copy of WordPress on Localhost. You can follow the instruction here on How to install WordPress on Localhost.
Login to your live WordPress Blog, enter the Admin page. In the navigation menu, mouse over the "Tools" menu and then click "Export"

Check "All content" to download all your posts, pages, comments, custom fields, categories and tags in a single WXR (xml) format.
Click on "Download Export File" and save it in your computer.
On Localhost, login to your WordPress, enter the Admin page from the Tools menu click "Import"

By default Wp importer plugin is not installed with WordPress, click on "Install Now" to install it.

After the plugin has been installed, click on "Run Importer" browse to the WXR (xml) file you've downloaded and then click on "Upload file and import"

Make sure you are connected to the internet to be able to download file attachments. It's much easier if you just "assign posts to an existing user", check the "Download and import file attachments" checkbox and then click "Submit"

Open your FTP client program and download plugins/themes from your hosting. Switch the theme and activate the plugins, arrange the widgets to make it look exactly like your live WordPress.
Done.
The second way is using phpMyAdmin to Export/Import database.
This method is a little bit complex but more efficient because all the settings, themes, plugins, widgets and even username and password will be the exact same as live WordPress.
I want to tell you that this method also can be used to move Wordress from one hosting to another hosting as I did or to move WordPress to a new domain as well.
Here is a step-by-step guide to move WordPress from hosting to Localhost
Open your favourite FTP program and connect it to your hosting, navigate to the path where the WordPress is installed.
Download "wp-content" folder and its contents. You can also use cPanel File Manager to compress and download "wp-content" folder.
Login to your hosting Cpanel and then click phpMyAdmin.
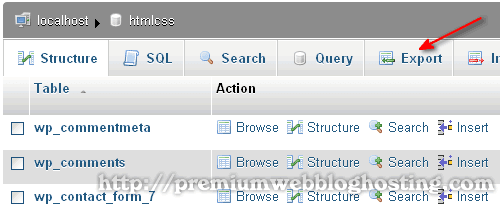
In the database list, click your WordPress database (if you are unsure, open wp-config.php to find out what your WordPress database name is). In this example mine is "htmlcss"

Click "Export" to export the database
In the Export Method select "Custom - display all possible options"

Select "zipped" or "gzipped" for compression type.

Click "Go" to start downloading the database.
Login to phpMyAdmin on localhost, if you installed phpMyAdmin as described here"How to install phpMyAdmin on Windows 10" , you can access it by typing "http://localhost/phpmyadmin" in the browser address bar.
If you want to use WordPress database that you have already installed, select it and at the bottom of the table list click "Check All" then select "Drop" in the drop-down list and then click "Yes" to delete all the tables.

Or if you want to use a new database, here is a guide of how to create MySQL database and then edit wp-config.php to match the database name.
Select the database that you want to use and then click "Import" browse to the zip or gzip that we have downloaded earlier.

Click "Go" to start importing the tables into the database. If everything went well you should see something like the image below.

Click on phpMyAdmin SQL tab and run these queries, replace http://domain-name.tld with your live WordPress url.
update wp_options set option_value = replace(option_value, 'http://domain-name.tld', 'http://localhost');
update wp_posts set post_content = replace(post_content, 'http://domain-name.tld', 'http://localhost');
update wp_posts set guid = replace(guid, 'http://domain-name.tld','http://localhost');
update wp_links set link_url = replace(link_url, 'http://domain-name.tld', 'http://localhost');
Replace "wp-content" in Localhost (D:\MyWebs\wp-content) with live WordPress "wp-content" folder.
Now try browsing to "http:/localhost" to view your blog and then login using your live WordPress username and password .
To make it loads faster, you should remove any scripts from your theme and widgets that require internet connection such as Analytic, Webstats, Shoutbox, Adsense Script etc...
If you face the problem with error 404 not found "the requested URL was not found on this server" try to resave the permalink settings in the WordPress settings page.
Here is a video on YouTube How to move WordPress from Server to Localhost
No comments:
Post a Comment